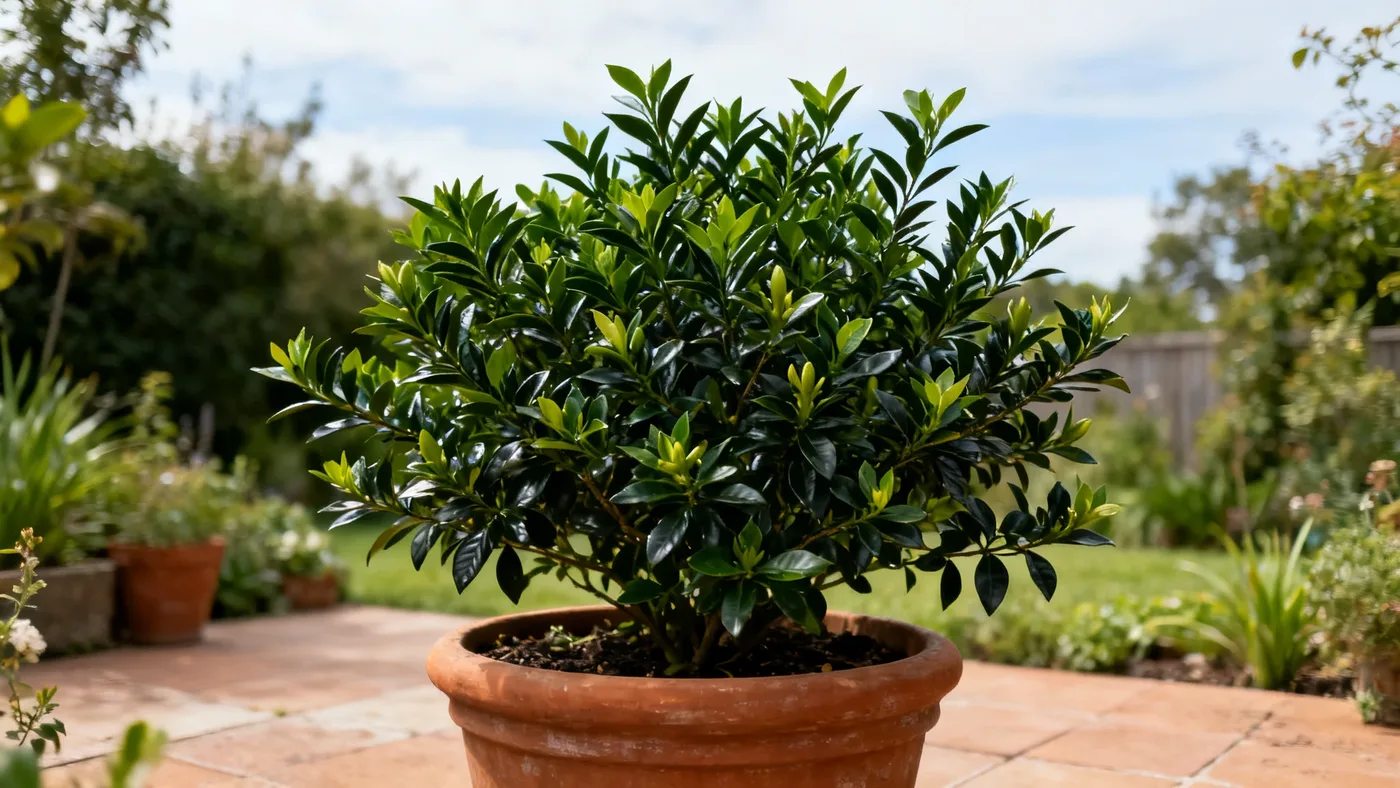
Growing Kleim's Hardy Gardenia in Pots and Containers
Kleim's Hardy Gardenia performs remarkably well in containers, making it an excellent choice for patios, decks, and entryways where in-ground space is limited. The smaller leaf structure and compact growth habit of this cultivar adapt well to pot life, and you'll have the flexibility to move your plant to optimal sunlight or shelter it during cold snaps. This guide walks you through container selection, soil preparation, planting, and the specific care that potted gardenias need to thrive and flower reliably.
Why Choose Container Gardening for Kleim's Hardy Gardenia
Growing Kleim's Hardy Gardenia in containers offers several practical advantages. You gain mobility: if your patio doesn't receive enough sunlight, or if an unexpected hard frost threatens in late spring, you can move your plant to a better location. Containers also let you control the soil environment precisely, which is critical for gardenias since they demand acidic, well-drained soil. In regions where alkaline tap water or native soil chemistry make in-ground gardening challenging, container growing with an acid-based potting mix solves that problem entirely.
Additionally, container plants stay more compact and bushier than in-ground specimens, requiring less pruning and fitting naturally into smaller landscapes. The pot itself can become a design feature, letting you choose an attractive container that complements your home's exterior.
Selecting the Right Container Size for Your Plant
Container size directly affects drainage, root development, and how long you can go between waterings. Kleim's Hardy Gardenia reaches a mature height of 2 to 3 feet and spreads 3 to 4 feet, though container specimens tend to stay slightly more compact than in-ground plants.
For a newly planted specimen, start with a container that is 2 to 3 inches larger in diameter than the nursery pot (typically a quart, #1, or #3 container). A #1 container (roughly 7 to 8 inches in diameter) typically fits a young plant well in a pot that is 10 to 12 inches in diameter.
For mature or larger specimens, use a container that is at least 18 to 20 inches in diameter and 15 to 18 inches deep. This size provides enough soil volume for a 2 to 3 foot mature plant and allows room for 1 to 2 years of growth before upsizing is necessary.
Always choose a container with drainage holes in the bottom. Poor drainage is the leading cause of root rot in potted gardenias, so drainage is non-negotiable. If you love the look of a containerless or single-drainage pot, use it as a decorative outer pot and place a draining pot inside.
Preparing Your Potting Mix
Kleim's Hardy Gardenia thrives in acidic, well-drained soil high in organic matter. Commercial potting mixes formulated for acid-loving plants like azaleas and camellias are ideal. These mixes typically contain peat moss or coconut coir, perlite, and bark, which provide both drainage and the slightly acidic pH the plant needs.
Aim for a soil pH between 5.0 and 6.5. If you prepare your own mix, combine equal parts high-quality potting soil, peat moss or coco coir, and bark mulch or perlite. Add a handful of sulfur or an acidifying agent if your potting base is neutral. Avoid heavy garden soil or compost-heavy blends, which compact over time and prevent the air circulation roots require.
Fill your container about one-third full with your prepared mix before planting.
Step-by-Step Planting Instructions
- Water the nursery plant thoroughly one to two hours before planting. This ensures the root ball absorbs water and slides from the pot more easily, and the roots are turgid and less prone to damage during transplanting.
- Gently remove the plant from its original pot. Turn the pot on its side and carefully slide the plant out. If it is root-bound (roots circling the outside of the soil), use your fingers to gently loosen the outer roots and tease them outward. Do not aggressively break up the root ball; a gentle hand prevents shock.
- Position the plant in its new container. The top of the root ball should sit at approximately the same depth as it was in the original pot. Planting too deep risks burying the stem in soil, which can rot. Planting too shallow leaves roots exposed. A rule of thumb: the soil line should be about 1 inch below the pot's rim, giving you space to water without overflow.
- Fill around the sides with your acidic potting mix. Add soil gradually, gently firming it as you go so there are no large air pockets. Avoid heavy compression; compacted soil reduces drainage and root growth.
- Water thoroughly until water drains from the bottom. This settles the mix, eliminates remaining air pockets, and ensures the root ball and surrounding soil are evenly moist. Empty any drainage tray after 15 to 30 minutes so the plant is not sitting in standing water.
- Add a 1-inch layer of bark mulch around the base. Keep mulch 2 to 3 inches away from the stem to prevent stem rot. Mulch helps the soil retain moisture and keeps roots cooler in summer heat.
- Place the container in a location with full sun to part shade. In hot southern climates, afternoon shade protects foliage and flowers from scorching. In moderate climates or northern zones (7 to 7b), full sun encourages the most abundant blooms.
Container Care and Watering
Potted gardenias require consistent moisture but never standing water. Check soil moisture every 2 to 3 days during the growing season by inserting your finger 1 inch into the soil. If it feels dry at that depth, water thoroughly. If it feels moist, wait another day or two.
In spring and summer when the plant is actively growing and flowering, watering may be needed 2 to 3 times per week, depending on temperature, humidity, and container size. Large containers dry more slowly than small ones; a 20-inch pot may need watering once weekly in mild weather, while a 10-inch pot might need water twice weekly in heat.
Reduce watering in fall and winter when growth slows. A container plant in a cool garage or sheltered location may need water only every 2 to 3 weeks. The soil should still be checked regularly; prolonged drought stresses the plant even in dormancy.
Use lukewarm water when possible. Cold water can shock the roots. Tap water is acceptable in most regions, though in areas with very alkaline or high-chlorine water, collecting rainwater or letting tap water sit for 24 hours before using can help.
Feeding and Fertilizing Container Gardenias
Container plants exhaust available nutrients faster than in-ground plants because watering leaches nutrients through the soil. Begin fertilizing in spring when new growth emerges, typically in late March or April depending on your zone.
Use an acid-forming fertilizer formulated specifically for azaleas, camellias, or gardenias. These products are designed to maintain soil pH in the preferred 5.0 to 6.5 range. Follow the product label for dosage and application frequency, typically every 2 to 4 weeks during the active growing season through August.
If foliage turns yellow with green veins (a sign of iron chlorosis, often from alkaline soil or water), apply a chelated iron supplement according to label directions. This symptom sometimes appears even in well-managed containers if water quality or seasonal stress tips the pH upward.
Stop feeding in early fall to encourage the plant to harden off before winter.
Pruning Potted Gardenias
Prune lightly right after flowering ends in late May or early June. Remove any weak, crossing, or damaged growth. Because Kleim's Hardy Gardenia sets next year's flower buds on new growth that emerges after this year's bloom, pruning after flowering ensures you do not remove developing buds. Avoid pruning in late summer or fall, as this cuts away the branches that will carry flowers in spring.
Container-grown plants typically stay naturally compact. Light shaping to maintain an even, mounded form usually requires only 15 to 20 minutes of work per season.
Winter Protection for Container Gardenias
Kleim's Hardy Gardenia is rated for USDA zones 7 to 9. Container plants are more vulnerable to cold than in-ground specimens because roots are above soil level and exposed to air temperature on all sides of the pot. In zone 7, particularly at the colder edge of the range (zone 6b and 7a), winter protection is essential.
In zone 8 and 9, containers can usually remain outdoors. In zone 7, move the pot to a sheltered microclimate such as against a south-facing wall or under an eave where it receives winter sun and wind protection.
In zone 6b or at the boundary of zone 7, move the container to an unheated garage, shed, or cold frame where temperatures stay above 0 to 5 degrees Fahrenheit. Water very sparingly during this dormancy period, just enough to prevent the soil from drying completely.
Do not place the pot directly on cold concrete or pavement; set it on wood or a plant stand so the container bottom is insulated from freezing ground. If moving is impractical, wrap the container with burlap or frost cloth in late fall and keep the covering on until late spring after the last frost date for your region.
Even with protection, foliage may show cold-stress yellowing or some leaf drop during a hard winter. This is normal. Once temperatures warm and growth resumes in spring, the plant typically recovers fully.
Common Mistakes to Avoid
Overwatering or poor drainage: The most common cause of failure. Let soil drain freely; never let the pot sit in a water-filled saucer. Check drainage holes regularly to ensure they are not blocked by soil or debris.
Wrong potting mix: Never use garden soil, pure compost, or general-purpose potting soil. These compact and retain too much water. Stick with an acid-loving plant mix or make your own with peat, bark, and perlite.
Insufficient light: Kleim's Hardy Gardenia needs full sun to part shade. A dark corner or heavily shaded patio will reduce blooms dramatically.
Neglecting to acclimate a newly purchased plant: Greenhouse-grown plants need 1 to 2 weeks of gradual exposure to outdoor conditions. Place the pot in dappled shade for the first week, then move to its final location. Sudden full sun can scorch tender foliage.
Forgetting to adjust water frequency when moving the pot: A container in shade requires less water than the same pot in full sun. After relocating your plant, observe its soil moisture for a few days and adjust your watering schedule accordingly.
Using cold water: Always use lukewarm water. Cold water temperatures can stress roots and trigger bud drop.
Expected Results and Bloom Performance
A well-maintained container specimen typically blooms the first year after planting from nursery stock, though the display may be lighter than established in-ground plants. By the second and third years, you can expect a generous late-spring to early-summer bloom in late May through June, with occasional light rebloom in favorable conditions in late summer. Flowers are pure white, aging to creamy ivory or yellow, and carry the strong, sweet classic gardenia fragrance.
Growth is moderate; plan for 6 to 12 inches of new growth per year depending on climate and care. Your plant will reach full mature size of 2 to 3 feet tall and 3 to 4 feet wide in about 3 to 5 years.
Quick Reference: Container Growing Checklist
| Task | Timing | Details |
|---|---|---|
| Select container | At planting | 18 to 20 inches diameter min. for mature plants; must have drainage holes |
| Prepare mix | At planting | Acid-loving plant mix; pH 5.0-6.5; well-drained, humus-rich |
| Plant or repot | Spring or early fall | Top of root ball level with soil surface; firm gently; water thoroughly |
| Check soil moisture | Every 2-3 days (growing season) | Water when top 1 inch feels dry; never allow standing water |
| Fertilize | April through August | Acid-forming fertilizer every 2-4 weeks; stop by early fall |
| Prune | Late May to June (after bloom) | Light shaping only; avoid late-summer pruning |
| Provide shade | Summer (hot climates) | Afternoon shade in zones 8-9 improves flower/foliage quality |
| Move for winter | Late fall (zone 7 and colder) | Shelter in unheated garage or against south wall; zone 8-9 may stay outdoors |
| Resume spring care | Late spring (after last frost) | Increase water; begin fertilizing; remove frost protection |